Add Device

The "Add Device" page allows you to add Z-Wave, Zigbee, or virtual devices to your hub, a process sometimes known as inclusion, pairing, or discovering. Some other devices, such as Lutron and the Philips Hue Bridge, are connected using integration apps which can be found in the Apps menu item.
Remember that as you connect Zigbee and Z-Wave devices, they will have a limited range. If they are too far from your hub, you will need to add repeating devices (devices that plug in to the wall or are AC/mains-powered) to make the connection. See How to Build a Solid Zigbee Mesh and How to Build a Solid Z-Wave Mesh for more.
Contents
How to Discover Your Devices
Here's how to add new Zigbee or Z-Wave devices:
- Select the Devices menu item from the sidebar, then select Add Devices in the upper right:
- Select Find by device type (to see compatible devices sorted by type, like dimmer or motion sensor) or Find by brand (to see compatible devices sorted by manufacturer/brand), then continue following the prompts to find your specific device.
- Pairing instructions will appear on this page for most compatible devices. Consult your device manual if available, as instructions may vary slightly between hardware or firmware revisions of similar devices.
- Alternatively, select one of the buttons under "Add a device manually" according the appropriate protocol: Z-Wave, Zigbee, Iris V1 Zigbee (note: not for Iris v2 or later), or Virtual.
- Put your device in paring mode (if not virtual), according to the device-specific instructions presented in step 2 or the ones included with your device, and follow the prompts.


Z-Wave Devices
Non-secure Z-Wave devices will pair without any additional action required. Devices that support Z-Wave S2 security will prompt as described below. (Devices that support security but only the older S0 security will also not prompt, and they may pair either securely or not, depending on what the device requests. It is recommended to avoid S0-only whenever possible.)
- For Z-Wave devices that support S2, you will see a security popup shortly after pairing begins asking if you want to pair with or without security. Choose your desired option:
- If you choose to continue with security, you will be prompted to either enter part of the device-specific key (DSK) or confirm that the code you see matches the device, depending on the type of S2 used. This code can usually be found on a sticker on the device or in the packaging.


To Exclude a Z-Wave Device
If you have a Z-Wave device that will not pair or was previously joined to and not removed/excluded from a previous network, try a general Z-Wave exclusion first. You may also need to try this if a previous attempt at pairing the device to your hub failed.
To do this, select the Z-Wave button or use the Find by... buttons to locate your specific device. Then, select the Start Z-Wave Exclusion button, put your device in exclusion mode (usually by pressing or holding a specific button or combination of buttons on the device; see the manufacturer's instructions). If successful, the you should see a message "Unknown Z-Wave Device was excluded". This means this device no longer is associated with a previous Z-Wave network and can now be paired with Hubitat Elevation.


Other Z-Wave Notes
Only one Z-Wave device can be added at a time. To add another Z-Wave device after adding one, simply start the process described above over again.
Zigbee Devices
For Zigbee devices, the hub will present a Start Pairing button after you select a Zigbee device from the Find by... wizard or press one of the two Zigbee type buttons. The Start Pairing button will put the hub in Zigbee pairing mode for 60 seconds. You can stop it at any time by pressing the Stop Pairing button (which will replace the Start Pairing button while pairing is active). You may pair more than one Zigbee device at a time, but you may prefer to do them one at a time for easier identification.
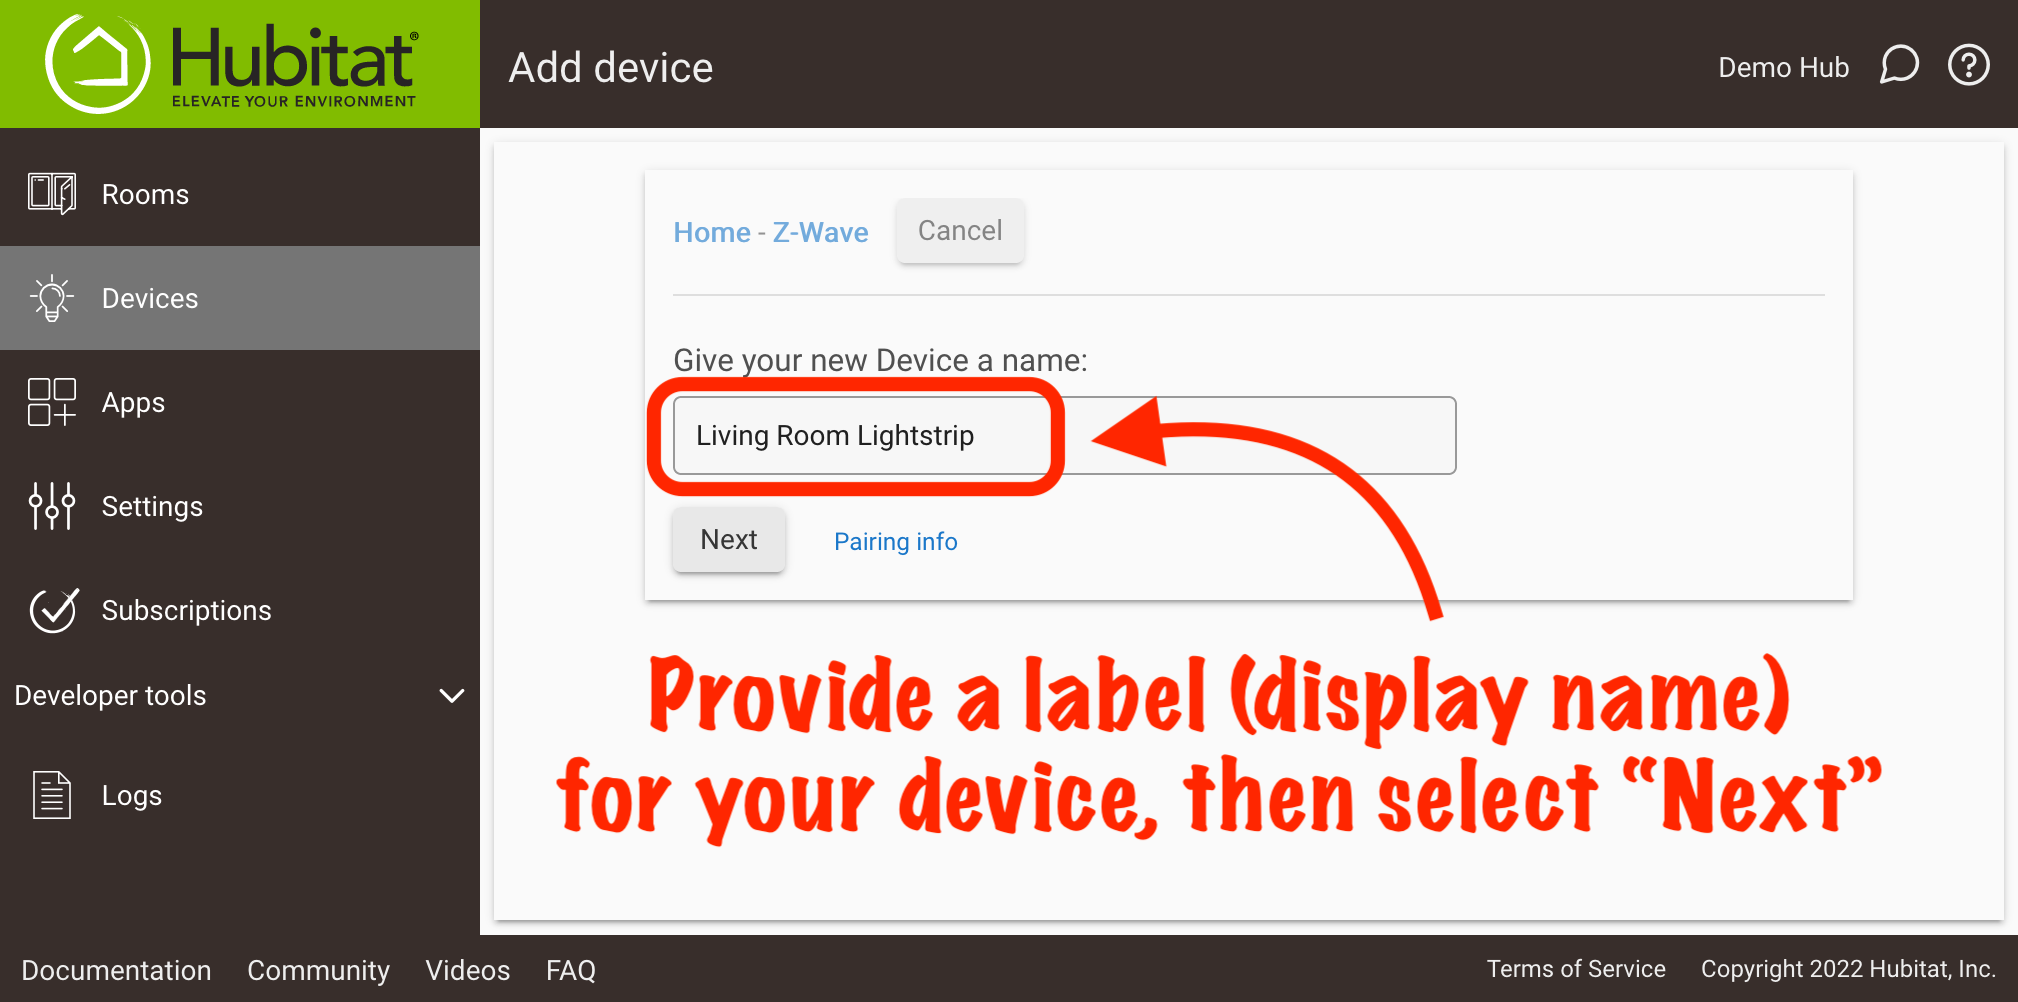
Naming a Device
After the hub discovers your device, you can give it a "label," or a friendly name that you can use to identify the device. This how it will appear in apps and logs, and it will also be used as the most prominent name on the Devices page if provided.
After naming, you will also be prompted to assign the device to a room. This will appear in Rooms in the left-side of the hub UI, be listed for status or control in the Devices tab of the mobile app for supported device types, and allow easier configuration with certain apps that offer room-based selections (e.g., Room Lighting). This step is optional (choose or create a room and select Next, or select Skip).

Virtual Devices
Virtual devices are useful as "simulated" devices that do not correspond to a real/physical device. For example, a virtual switch device using the "Virtual Switch" driver allows you to send on() and off() commands to the device and have the switch state update as expected, simulating the behavior of a "real" device without actually doing anything. This can be helpful to test app behavior without needing to rely on a real device.
Some LAN or cloud devcies can also be manually created like "virtual" devices using a specific driver and setup instructions provided for that device or integration.
Troubleshooting
If your device does not pair, here are some potential culprits:
- Is your device compatible? Hubitat Elevation includes Z-Wave™ and Zigbee radios that work with a wide variety of Zigbee and Z-Wave devices. Check this list of known compatible devices. Devices running on different protocols, such as Lutron and Philips Hue Bridge, require a bridge that must be paired using an integration app. Lutron and the Hue Bridge have discovery processes their own. The Lutron and Hue bridges are not added to Hubitat Elevation via the discovery process.
- Is your device out of range? Z-wave and Zigbee radios have a limited range that is further reduced by obstructions, included metal, wood, concrete, plaster and drywall. It is important to build out a mesh network that includes plugged-in or AC mains powered devices that act as repeaters and boost the range and signal strength of your hub. Battery operated devices do not function as signal repeaters. Note: You should not use Zigbee lightbulbs to repeat signals, since their performance for that task is poor among anything but another lightbulb, which will result in an unstable Zigbee radio mesh for your other Zigbee devices. See the How to Build a Solid Zigbee Mesh and How to Build a Solid Z-Wave Mesh documents for further details.
- Is this a Z-Wave device from another hub? Unless it is a new device, Z-Wave devices must be excluded from their previous hub before they can be joined with a new hub. Ideally you should perform a device exclusion and a factory reset before attempting to join it to the new Z-Wave network. If the procedure to factory reset is not available, then you should at least perform a general exclusion (see above).
- Is your device in pairing mode? All devices are different. Check the device manual to make you have followed the proper procedure to put it in pairing mode.
- Did your Z-Wave device fail to be included properly? Run a general Z-Wave exclusion (see above), then try joining it again.
- Is the device battery dead? Try pairing with a fresh battery.
- Are there Zigbee bulbs interfering? Certain Zigbee bulbs may interfere with the routing of the Zigbee network traffic. If you're having trouble with Zigbee device discovery, try temporarily removing nearby bulbs to see if this alleviates the issue. Be sure to add AC powered Zigbee repeaters. Do not rely on Zigbee lightbulbs to repeat signals, since their performance for that task is poor among anything but another lightbulb, which will result in an unstable Zigbee radio mesh for your other Zigbee devices. Sengled is the only known manufacturer that make Zigbee lightbulbs which do not attempt to repeat signals to other devices. Therefore, they are the only known Zigbee smart bulbs that do not require special attention. See the How to Build a Solid Zigbee Mesh and How to Build a Solid Z-Wave Mesh documents for further details.